Showing posts with label Recipe. Show all posts

Monday, August 23, 2010

Trying not to be a fatass: Turkey Meatloaf and Cauliflower Mash

It's been awhile since I've updated (and I say this every time) - I've been consumed with working out and losing weight which is pretty much the arch enemy of my life long goal to deep fry all my food. For those of you who haven't seen me in forever, I have been crutching around Manhattan in a boot and children's crutches since I fractured 5 bones about 2 months ago. I just got the boot off a few weeks ago so now I'm raring to go and have 4 upcoming races I'm training for! That being sad, shaving of the old LBs will certainly help my time so I've been exploring less fatty fat ass things to eat while not starving myself.

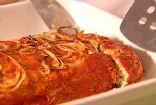
To date I've lost 13 lbs since I've gotten on the starvation train - I'm hoping I can maintain it with fake comfort food like this Turkey Meatloaf and Cauliflower Mash. The meatloaf is really delicious and pretty healthy (nutritional info can be found below the recipe) and the cauliflower mash is pretty good too (although not nearly as good as real mashed potatoes) - you can find many variations of the recipe that taste better but in my experience better taste means more cheese and butter. I mean, you might as well just eat real mashed potatoes at that point. My version has about 29 calories per serving and is pretty low-carb. Enjoy!

Healthy Turkey Meatloaf

Serves 6


Ingredients
3/4 cup quick-cooking oats
1/2 cup skim milk
1 medium onion, peeled
2 pounds ground turkey breast
1/2 cup chopped red bell pepper
2 eggs, beaten
2 teaspoons Worcestershire sauce
1/4 cup ketchup
1/2 teaspoon salt
Freshly ground black pepper
1 (8-ounce) can tomato sauce


Directions
1. Preheat the oven to 350 degrees F.
2. In a small bowl, stir together the oats and milk. Thinly slice 1/4 of the onion and set aside. Finely chop the remaining onion. In a large bowl combine the turkey, oat mixture, chopped onion, bell pepper, mushrooms, eggs, Worcestershire sauce, ketchup, salt and a few grinds of pepper. Mix just until well combined.
3. Transfer the mixture to a 9 by 13-inch baking dish and shape into a loaf about 5 inches wide and 2 1/2 inches high. Pour the tomato sauce over the meatloaf and sprinkle with the sliced onions. Bake for about 1 hour or until an instant-read thermometer registers 160 degrees.F.
4.
Remove from the oven and let rest for 10 to15 minutes before slicing.

Cauliflower Mash
Serves 6

Ingredients
1 1/2 lbs of cauliflower, cut into florets
3 Cloves Peeled Garllic
2 cans (14 oz ea) Reduced Sodium Chicken Broth
2 TBS chopped Fresh Chives

Salt and Pepper to taste


Directions
1. In a large saucepan, combine cauliflower, garlic and broth. If cauliflower is not completely covered by broth, add water until just covered
2.
Bring to a boil; reduce heat to medium low.
3.
Let simmer for 12 mintes, or until cauliflower is tender.
4.
Drain; reserve 2TBS of liquid.
5.
In food processore, pulse cauliflower and garlic until smooth; add 1-2 TBS of reserved liquid if mixture is dry.
6.
Season with salt and pepper to taste. Just before serving stir in chives. Serve warm
7. Optional: Serve with Cheese or other goodness to make it more tasty!

Nutritional Info:

Turkey Meatloaf:
Calories per serving: 233
Fat: 9.2g
Carbs: 15.2g
Protein: 23.4g
Dietary Fiber: 2.1g

Cauliflower Mash:
Calories per serving: 28.5
Fat: 0.2g
Carbs: 5.1g
Protein: 2.9g
Dietary Fiber: 2.1g

Monday, March 1, 2010

Kiew Family Eggrolls Recipe REVEALED!

Our family has been serving these eggrolls ever since I was born 27 years ago (ugh). The recipe combines pork with imitation crab meat for a deliciously flavorful and texturally interesting appetizer.

This is a Kiew Family recipe that I'm probably supposed to take to the grave but for the sake of my readers and foodies everywhere, I will post it. I'll also go over some good techniques for rolling eggrolls and eggroll-like things that will help you in the future.

Rolling Eggrolls:
First and foremost, you need to make sure to get good wrappers. I typically go to Chinatown and browse in the freezer section of the grocery stores. You want a square wrapper (it should be about 8x8, give or take) that isn't too thick or thin. The consistency of the wrapper will definitely affect how the eggroll cooks and tastes so make sure to try out a few different ones if you don't get it the first time out. If you live in the NYC or Bay Area (Cali), ask me and I can give you a few helpful hints.

Secondly, make sure to defrost the wrappers in the fridge for a few hours beforehand. Trying to separate them out if their still frozen is going to result in a bunch of tearing and unhappiness. It's also important to keep the wrappers from drying out while you're working with them. I like to dampen a paper towel with cool water and lay it on top of the them so they don't end updried out. you can also do the same for the completed pre-cooked eggrolls to keep them from hardening.

To roll, start with the filling on the a corner of the wrapper. Make sure to put about a tablespoon of filling, no more and no less, otherwise your roll may end up misshapen or worse, exploding in
the frying process. Step 1 of the rolling process should look like this:


Fold up the same corner where you just put the filling. fold in the sides towards the center of the wrapper. The roll should now look like an envelope:


The most important part of the process is to make sure you roll the filling in tightly. If it's too loose, the eggroll will probably come apart during the cooking process. Keep it airtight also helps the eggroll crisp up and cook evenly. At the end of the process, you'll end up with this:


As you'll notice, a little flap is still hanging out, waiting to be dealt with. Separate an egg white out and put it in a shallow bowl. Dip the little flap into the bowl (no need to go nuts, a little bit will do) and use it as an edible adhesive to seal off your eggroll. Tada! You're done!

Kiew Family Eggrolls


Directions:
1/2 lb lean ground pork
1 large yellow onion, coarsely chopped
1 large carrot, shredded
1/2 tablespoon soy sauce
1/2 tablespoon dark soy sauce
1 tablespoon oyster sauce
1 teaspoon oil
3 cloves garlic
Imitation crab meat to taste

To Wrap:
Eggroll wrappers (30)
1 egg white

To Prepare:
Vegetable Oil (about 3 cups), for deep frying

1. Heat oil in a large frying pan, add garlic
2. Add ground pork until browned but not fully cooked through
3. Add onion, cook until translucent (about 4-5 minutes)
4. In a separate bowl, mix all sauce ingredients together (soy sauce, dark soy sauce, oyster sauce) - add a tiny bit of water to loosen the mixture slightly.
5. Add sauce to the stir fry, mix well


7. Taste - add additional sauce as needed until desired level of saltiness
8. Add crab meat - cook for no longer than 1 minute
9. Transfer mixture to a bowl and cool in fridge for 1/2 hour
10. Wrap eggrolls as directed
11. Heat up vegetable oil in a small sauce pan - you'll know the oil is hot enough when you stick a chopstick in and bubbles form around the stick.
12. Deep fry eggrolls until golden brown (usually around 5-7 minutes). Be sure to not crowd the saucepan and check frequently to make sure the rolls are not burning.


13. Transfer to a paper towel to drain and cool
14. EAT!!

I hope you guys get as many years of joy out of this recipe as I have. Just don't forget that deep fried food goes directly to your ass...

Thursday, February 25, 2010

Separation Anxiety from my favorite childhood food - Taiwanese Beef Noodle Soup

When I decided to move to NYC, I had no doubt in my mind that I was making the right decision. It was something I had wanted all my life and even though I had no job, I felt like I was really living the life. I never had ANY anxiety about moving there with the exception of one small thing - what about the foods I like to eat? I have to leave them? The thought of leaving behind all the flavors and tastes I had become accustomed to was similar to breaking up with someone. It was absolutely heartbreaking and I think I had to enter a 12 step program although I'm not entirely sure since I blocked out that entire time period.

If you ever had any doubt that I am addicted to food and an incredible fat ass, I hope I've been able to put your mind at ease.

I have been going to a small restaurant in San Jose, CA called "Li Hwa" since I was maybe 5 years old. It's a complete hole in the wall, next to a Radio Shack and a Hush Puppies store in a vast Target parking lot. The owners were fresh of the boat (probably less fresh now since its been like 20 years) and everything about the restaurant seemed authentic and it was nice to see these new immigrants be able to cook food they were familiar with and be able to build a better life because of it.

I am a creature of habit and enjoy eating the same foods over and over and over again. You could say that their Taiwanese Beef Noodle Soup was my equivalent of comfort food. While some like Fried Chicken or Meat Loaf, I like to slurp up a big, hearty bowl of this beefy broth.

While this dish can be served in many different ways, ranging from oily to spicy to mild, I like mine hearty, rich, and a tad bit spicy. The soup is not an appetizer, but a filling main course, with tender pieces of beef floating in it. It's typically served with pickled greens, but for this particular recipe, I chose to just take on the challenge of the soup for now.

I found the recipe on Eat Drink and Be Merry and almost rejoiced. The hardest thing about finding Chinese recipes is trying to figure out what the "Americanized" name for it might be. I spent a lot of time with Google before I figured it out. Turns out, typing in the phonetic name, or Niu Ro Mian", helped tremendously. I made some minor modifications - for example, it's usually served with thick wheat Chinese noodles, but I've also liked it with bean thread noodles (or mung bean noodles) - I think it gives it a little more "oomph" and fills you up more than other noodles.

Try this recipe on a winter's day... like now? In the Snurricane?

Taiwanese Beef Noodle Soup (Niu Ro Mian)


Ingredients:
??? water
2 lbs. of beef shank, cubed
2 cloves of garlic
5 slices of ginger
2 green onions (smashed the white part with my knife)
Shaoxing rice wine
soy sauce (used for flavoring)
dark soy sauce (used for coloring)
star anise
five spice powder (wu xiang fen)
salt & white pepper
sugar

To Serve:
Bean Thread Noodles (Mung Bean), soaked and ready to cook
Chopped scallions to garnish


Directions:
1) Add Salt and White Pepper to cubed shank meat. Mix in a little Shaoxing rice wine, dark soy sauce, sugar, and a little bit of oil (olive oil is fine). Let it marinate in the fridge for 15 minutes.
2) Heat up a medium pot until its smoking hot. Add oil, garlic, ginger slivers, and green onions - cook until slightly browned (about 1 minute).
3) Add in marinated beef and cook until dark brown.
4) Fill up the pot with water (about 1-2 inches from the brim) and boil on high heat. Reduce to medium once it comes to a full boil. You will see impurities float to the top - skim off as needed to remove.
5) Add soy sauce, star anise, and five spice powder to taste.
6) Let simmer for at least 3-4 hours. If you have a cast iron pot (like a Le Creuset), you can usually put the soup on very low heat overnight, about 6-8 hours. Feel free to add water as needed, depending on how you like your soup (thicker, more watery, etc)

This is a hard recipe to give exact measurements for because it's really served to your liking - I've had the same dish a million different ways, but I still keep going back to Li Hwa for my favorite.

I feel like I can rest easy now that I have a lot of my favorite "home" recipes figured out. If anyone can give me the recipe for Panda Express' Orange Chicken, I will be your best friend forever.

Wednesday, February 24, 2010

Hainanese Chicken Rice : Give your chicken a poach

I have never been a chicken fan. If I had to pick from the poultry family, I would go with a delicious and sleep inducing Turkey. I think the reason I tend to avoid chicken is because it more often than not, it comes out dry. Dry chicken reminds me of being a diet I desperately want to quit - I absolutely can't stand it.

That being said, one of my favorite recipes includes Mr. Chicken ( i guess Ms. Chicken would be more accurate). Hainanese Chicken Rice has been in our family for years and I've finally mastered it and am able to whip it up sans recipe. That's always an amazing feeling. Anyway, the reason why this chicken passes my test is because it's always moist. The poaching method that's used in this dish ensures a tender and succulent bite, every time.

Since this is a Kiew family specialty, I hope you don't tip off the paparazzi. The key to this dish is really in the rice preparation, and the sauces. You'll use a whole chicken in this, so don't be afraid to spend a little extra for an organic, young bird - this dish is so minimalistic that the quality of the meat really counts.

Hainanese Chicken Rice

Chicken:
Whole Chicken (preferably Ranch or Yellow)
Ginger, coarsely chopped
1 stalk Scallions, coarsely chopped
4-5 Cloves Garlic, Peeled
Salt

Chicken Rice:
1 1/2 cups Jasmine Rice
Chicken Stock (from poached chicken)
5-6 Garlic Cloves, peeled and smashed
Rendered Chicken Fat (from chicken)

Special Dipping Sauce:
2-3 Tablespoons Sambal Olek
Cilantro (to taste)
Chicken Stock (from poached chicken)
Lemon juice (to taste)

Directions:

Chicken:
1) Remove bag with giblets, etc - trim any visible fat and set aside later for Chicken Rice
2) Stuff Chicken with Garlic, Scallions, and Ginger
3) On stove, boil a pot of salted water - make sure the pot is big enough to submerge the entire chicken (I used a stock pot)
4) When the water is boiling, submerge enter bird, breast down, into the water. Turn down the heat so chicken is being poached, not boiled (usually the low setting). Cover and cook for 40-50 minutes, depending on the size of the bird.
5) Remove from Stove - retain chicken stock for Rice and Dipping sauce.
6) Submerge Chicken into Icy Bath for approximately 10 minutes to stop cooking process and cool
7) Remove bird from Icy Bath and de-bone, slicing into serve-able pieces - serve with Rice and Dipping Sauce.

Chicken Rice:
1) Take Chicken Fat removed from bird in step 1 above and put into a very hot pan on the stove. Fat will render within a few minutes - take the fat out and set aside.
2) Wash/Rinse Jasmine Rice
3) Put Rice into Rice Cooker - add oily part of chicken stock to cover about 1 inch above the rice. Add in rendered chicken fat and whole garlic cloves. Cook until ready.

Special Chili Dipping Sauce:
1) Using a food processor, mix all ingredients for about 20 seconds to taste. Serve with chicken.

Here are the pics of the results. Did I mention this tastes amazing with an ice cold ginger ale?


Oh also if you love garlic, you can combine some minced deep fried garlic to the chili sauce. I usually make it on the side with some olive oil - just mince 4-5 cloves of garlic and fry it in a pan with about 4 tablespoons of oil. The crunchiness and kick will add some deliciousness to the dish. Just don't make out with anyone after...

Sunday, May 17, 2009

Chicken Pot Pie (aka Cellulite)

I have a soft spot for all things butter so naturally Chicken Pot Pie is one of my favorites. For years now I  haven't let myself eat it. I saw myself in a downward spiral of fattening crust and creamy filling. Similar to that of a recovering alcoholic, I try to not put myself in the position of being around it, especially when famished. 

I'm not sure what possessed me to try making it on my own (previously I have been going to th
e Smith or the less classy, Marie Calendar's to get my fill) but I researched a recipe that seemed easy to make but wasn't too easy (i.e put a can of cream chicken soup in a ready-made crust) 

This recipe came out flakey and delicious. I tweaked it slightly but omitting potatoes (not sure I want so much starch in my pie) and adding a ton of crushed black pepp
ercorns to give it a little zing. Recipe below - enjoy! 

Chicken Pot Pie

Ingredients: 
6 tablespoons butter
1 cup chopped onions
1/2 cup chopped celery
6 tablespoons flour
2 cups chicken stock
1 cup half and half (I used non-fat half and half) 
1 cup diced carrots, blanched
1 cup peas, blanched
2 cups cooked chicken, shredded
2 tablespoons fresh chopped parsley 
Salt and Pepper
Ready-made crust (or make your own if you have the time) 

Directions: 

Preheat oven to 400 degrees - Grease 9-inch round baking pan. 

Melt butter in a large saute pan - add celery and onions. Season with Salt and Pepper

Stir in flour slowly for about 3-4 minutes to create a blond roux (a roux is used for thickening sauces, similar to cornstarch but with better results). Add chicken stock and bring to a boil. Reduce heat to a simmer and continue to cook for another 5-6 minutes, or until sauce starts to thicken. Add half-and-half and continue to cook for another 4 minutes. Season with Salt and Pepper. Add Carrots, Peas, Parsley, and Chicken - stir thoroughly: 


Line the baking pan with one side of the crust - pour filling in: 


Place the top crush on top of the filling. Carefully tuck the overlapping crust into the pan forming a thick edge. Crimp the edges of the pan and place on a baking sheet. Place the sheet in the oven and bake for 25-30 minutes or until the crust if golden brown. 

I have to say, she's a beaut. Below are pics of both the whole pie and her insides (if you're wondering, that was intended to sound gross): 


Wednesday, January 21, 2009

Guaca-HOLY-MOLY

Just in time for that big football game (PS no idea who is playing) I wanted to post my Big Bro's amazing Guacamole recipe... for whatever reason it's seriously tasty and I have absolutely no idea where it originated... ENJOY!

Serves 7-8

INGREDIENTS:
4 ripe avocados (hint: keep your Avocados in a sealed paperbag for a few days before making this - it ripens them up)
1 medium red onion, minced
1-2 serrano chiles, stems and seeds removed (very important!), minced
half a bunch of cilantro leaves, finely chopped
1/2 a fresh lime
fine salt to taste (I would use the salt grinder type)
freshly grated black pepper to taste
1/2 ripe tomato, seeds and pulp removed, chopped

DIRECTIONS:

1. Cut avocados in half. Remove seed. Scoop out avacado from the peel,
put in a mixing bowl.

2. Using a fork, mash the avocado. Add the chopped onion, chili,
cilantro, lime or lemon, salt and pepper and mash some more. Be sure
to taste and add quite a bit of salt and pepper.

3. Keep the tomatoes separate until ready to serve. Cover with plastic
wrap directly on the surface of the guacamole to prevent oxidation
from the air reaching it. Refrigerate until ready.

4. Just before serving, add the chopped tomato to the guacamole and mix.

Sunday, January 11, 2009

My favorite food ever : Carrot Cake

If I was stranded on a dessert island with only 3 things, it would probably be James Franco, my DVR, and Carrot Cake. I make this about once a year at home where my mom has a ton of great baking equipment.

I'm not sure if its the delicious cream cheese frosting, the cinnamon, or walnuts (I'm nuts about NUTS!) but Carrot Cake is my FAAAAAAVORITE thing ever. I want it to be my wedding cake and when I make this, it's usually gone in like 3 days (at the expense of my daily caloric intake). Thought I'd share the recipe and spread the love..

This recipe has no raisins cause there is nothing i find more disgusting than raisins. I've had a lot of carrot cake in my day, but this is by far the best recipe:

Carrot Cake

1 1/2 cups granulated sugar
1 cup vegetable oil
3 eggs
2 cups all-purpose flour
2 teaspoons ground cinnamon
1 teaspoon baking soda
1 teaspoon vanilla
1/2 teaspoon salt
3 cups shredded carrots (about 5 medium)
1 cup coarsely chopped nuts

Cream Cheese Frosting
1 package (8oz) cream cheese, softened
1/4 cup butter or margarine, softened
2 to 3 teaspoons vanilla
4 cups powdered sugar

1. Preheat oven to 350 degrees F. Grease the bottoms and sides of one 13x9 inch pan or two 8 or 9 inch round pans with shortening ; lightly flour. In a large bowl, beat granulated sugar, oil, and eggs with electric mixer on low speed about 30 seconds or until blended. Add flour, cinnamon, baking soda, 1 teaspoon vanilla and the salt; beat on low speed 1 minute. Stir in carrots and nuts. Pour into pan(s).

2. Bake 13x9 inch pan for 40-45 minutes, round pans 30-35 minutes, or until toothpick inserted in the center comes out clean. Cool completely (about 1 hour).

3. In a medium bowl, beat cream cheese, butter, milk, and vanilla with an electric mixer on low speed until smooth. Gradually beat in powdered sugar, 1 cup at a time, on low speed until smooth and spreadable. Frost 13x9 inch cake or fill and frost round layers with frosting. Store in refrigerator.

Thats the recipe as is but I add more walnuts on the side of the cake for decoration and also because, well, walnuts are delicious.

Try this!

Monday, December 29, 2008

Baby's First Dinner Party

Awhile back, I hosted my first dinner party... EVER. I never anticipated ever having the desire to host anything, let alone feeding 5 of my friends so needless to say, shopping was a bitch since I had no ingredients (nope, not even sugar),

I tried to plan my menu carefully as to not overwhelm both my amateur cooking and hosting skills. Here are some tips:

- Pick an entree that can pretty much cook itself (minimal prep time and long cook time without supervision)
- Use Crowd Pleasers foods or as I like to call them, food with cheese and/or chocolate
- Distract everyone with tons of alcohol

I employed all these tactics and chose the following menu from my favorite food magazine Food and Wine:

Entree:

LEEK MACARONI AND CHEESE


4 tablespoon unsalted butter
1 bunch leek greens (from 1 1/2 lb leeks) - thinly sliced
Salt and Fresh Ground Pepper
3 tablespoon all-purpose flour
3 cups half and half or whole milk (I used non-fat half and half which tasted great)
10 ounces Manchego Cheese (shredded, about 2 1/2 cups)
1 lb elbow macaroni


Directions:
  1. Preheat the oven to 350°. Melt 2 tablespoons of the butter in a large skillet. Add the leeks and cook over high heat, stirring just until slightly wilted, 5 minutes; season with salt and pepper. Cook over low heat until very tender, about 20 minutes.
  2. Meanwhile, in a large saucepan, melt the remaining 2 tablespoons of butter. Add the flour and cook over moderately high heat, whisking, for 2 minutes. Add the half-and-half and bring to a boil, whisking until thickened, about 5 minutes. Remove from the heat. Add 2 cups of the cheese, season with salt and pepper and whisk the cheese sauce until melted.
  3. In a large saucepan of salted boiling water, cook the macaroni until nearly al dente. Drain well. Add the macaroni and the cheese sauce to the leek greens and stir until combined.
  4. Transfer the macaroni to an 8-by-11-inch baking dish and sprinkle with the remaining 1/2 cup of cheese. Bake for about 40 minutes, until bubbling. Turn the broiler on and broil the mac and cheese until golden brown on top, about 3 minutes. Let stand for 15 minutes before serving.
Served with:

SPINACH AND AVOCADO SALAD


3/4 lb Thick Cut Bacon
3 tablespoons honey mustard
Kosher Salt and freshly ground Pepper
1/3 cup Extra Virgin Olive Oil
2 5-ounce bags pre-washed baby spinach
1 pint Grape Tomatoes, halved
3 large Scallions. white and tender parts, thinly sliced
2 large Haas Avocados, peeled and sliced into wedges


DIRECTIONS:
  1. Preheat the oven to 500°. Arrange the bacon slices on a large, heavy, rimmed baking sheet. Roast for 15 minutes or until golden brown, turning the slices halfway through. Drain the bacon on paper towels and let cool, then cut the strips crosswise into 1-inch pieces.
  2. In a small bowl, whisk the sherry vinegar with the honey mustard and season with salt and pepper. Whisk in the olive oil until emulsified.
  3. In a bowl, toss the spinach, tomatoes and scallions with the vinaigrette. Arrange the salad on plates, top with the sliced avocados and bacon and serve.
RESULTS:
From the "yummies" I got around the table (table = coffee table and floor), it seemed like everyone liked it. People were inquiring what was in the dressing even though it was super simple ingredients, so this salad is a lot fancier than it seems. I added a little bit more crunch and texture by topping the salad with some crispy shallots.

The mac and cheese was great and made about 8 servings overall - I brought it to work the next day to share and it heated up in the microwave, no problemo. On a difficulty rating, this duo was probably a 5... not a lot of prep work, I just stuck the mac and cheese in the oven and worked on the salad.

Onto dessert which I feel like was a real home-run with both the guests and myself ... mostly cause it was the easiest thing ever to make...

DESSERT:

Banana-Chocolate Spring Rolls


2 medium Bananas
Eight 7 1/2 inch square spring roll wrappers
1 egg white, lightly beaten
32 semi-sweet chocolate chips (I used dark chocolate...mmm....)
8 teaspoons shredded and sweetened coconut
Vegatable Oil (for frying)
Confectioners ' sugar and cocoa, for dusting (I skipped this part and plated using fresh raspberries and a chocolate smear)


DIRECTIONS:
  1. Cut each banana in half lengthwise and halve each piece crosswise. Work with 1 wrapper at a time; cover the rest with a damp paper towel. Lay 1 wrapper on a work surface and lightly brush the edge with beaten egg white. Place a banana quarter 2 inches from the bottom of the wrapper and top it with 4 chocolate chips and 1 teaspoon of coconut. Fold the bottom edge over the filling and roll up 1 complete turn. Fold in the sides and continue rolling to form a tight cylinder. Repeat with the remaining ingredients.
  2. In a medium saucepan, heat 2 inches of vegetable oil to 350°. Add 2 spring rolls at a time and fry until golden brown, about 1 minute per side. Drain on paper towels. Dust the spring rolls with the sugar and cocoa and serve.
RESULTS:
As I mentioned, this was super popular and it made me happy cause it was cinchy. I served it with coconut sorbet (one of my favorite desserts solo). The really awesome thing about this dessert was it didn't feel too heavy or too sweet. It was the perfect way to end the meal.

All in all, the hardest part about the whole dinner party was timing. Timing out when the guests would show up, getting all the prep work done, etc - that was my biggest challenge. I still haven't mastered it, so I have no hints but I'll keep you posted on what I learn in the future.

Big THANK YOU to all my culinary guinea pigs... thanks for eating my food and maybe pretending to like it..